Airgeddon-ng
Airgeddon-ng is a tool in the airmon-ng suite that will help us automate the process of an evil twin attack this tool along with two more different tools Fluxion and Wifiphisher will help us launch an evil twin attack faster. let's get started. Step 1: Make Sure You Have Everything To prepare for our evil twin access point attack, we'll need to be using Kali Linux or another supported distro. Quite a few distributions are supported, and you can check out the Airgeddon GitHub page for more about which Airgeddon will work with. You can use a Raspberry Pi running Kali Linux for this with a wireless network adapter, but you'll need to have access to the GUI and not be SSHed into the Pi, since you'll need to be able to open and navigate multiple windows in this multi-bash script. Finally, you'll need a good wireless network adapter for this. In our tests, we found that the TP-Link WN722N v1 and Panda Wireless PAU07 cards performed well with these attacks. Step 2: Install Airgeddon To start using the Airgeddon wireless attack framework, we'll need to download Airgeddon and any needed programs. The developer also recommends downloading and installing a tool called CCZE to make the output easier to understand. You can do so by typing apt-get install ccze a terminal window.
apt-get install cczeNext, we'll install Airgeddon with a git clone.
git clone https://github.com/v1s1t0r1sh3r3/airgeddon.gitThen change directories and start Airgeddon with the following commands.
cd airgeddon
~/airgeddon# sudo bash ./airgeddon.sh
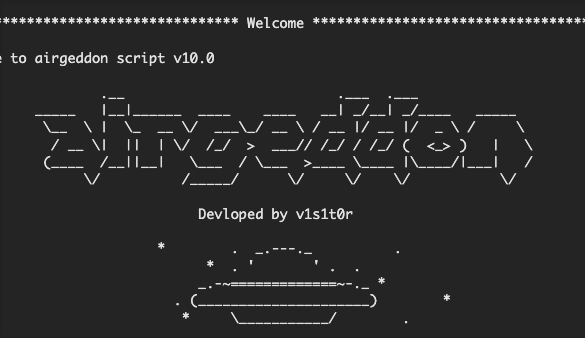
If you see the alien spaceship, you know you're ready to hack.
 Step 3: Configure Airgeddon
Press Enter to check the various tools the Airgeddon framework relies on. If you're missing any (it'll say "Error" next to them), you can hit Y and Enter at the prompt to try and auto-install anything missing, but that generally doesn't work.
Instead, open a new terminal window and type apt-get install tool, substituting "tool" for the name of the missing tool. If that doesn't work, you can also try sudo pip install tool. You should install all the tools, otherwise, you may experience problems during your attack, especially if you are missing dnsspoof.
Step 3: Configure Airgeddon
Press Enter to check the various tools the Airgeddon framework relies on. If you're missing any (it'll say "Error" next to them), you can hit Y and Enter at the prompt to try and auto-install anything missing, but that generally doesn't work.
Instead, open a new terminal window and type apt-get install tool, substituting "tool" for the name of the missing tool. If that doesn't work, you can also try sudo pip install tool. You should install all the tools, otherwise, you may experience problems during your attack, especially if you are missing dnsspoof.
When you have all of the tools, proceed to the next step by pressing Enter. Next, the script will check for internet access so it can update itself if a newer version exists.
The script will check for internet access looking for a newer version. Please be patient...

The script is already in the latest version. It doesn't need to be updated
Press [Enter] key to continue...
When that is done, press Enter to select the network adapter to use. Press the number on your keyboard that correlates to the network adapter in the list, then Enter
***************************** Interface selection ******************************
Select an interface to work with:
---------
1.  eth0  // Chipset: Intel Corporation 82540EM
2.  wlan0 // 2.4Ghz // Chipset: Atheros Communications, Inc. AR9271 802.11n
---------
*Hint* Every time you see a text with the prefix [PoT] acronym for "Pending of Translation", means the translation has been automatically generated and is still pending of review
---------
After we select our wireless network adapter, we'll proceed to the main attack menu.
***************************** airgeddon main menu ******************************
Interface wlan0 selected. Mode: Managed. Supported bands: 2.4Ghz

Select an option from menu:
---------
0.  Exit script
1.  Select another network interface
2.  Put interface in monitor mode
3.  Put interface in managed mode
---------
4.  DoS attacks menu
5.  Handshake tools menu
6.  Offline WPA/WPA2 decrypt menu
7.  Evil Twin attacks menu
8.  WPS attacks menu
9.  WEP attacks menu
10. Enterprise attacks menu
---------
11. About & Credits
12. Options and language menu
---------
*Hint* If you install ccze you'll see some parts of airgeddon in a colorized way with better aspect. It's not a requirement or a dependency, but it will improve the user experience
---------
>
Press 2 and Enter to put your wireless card into monitor mode. Next, select option 7 and Enter
for the "Evil Twin attacks" menu, and you'll see the submenu for this attack module appear.
Step 4: Select the target
Now that we're in our attack module, select option 9 and Enter for the "Evil Twin AP attack with captive portal." We'll need to explore for targets, so press Enter, and you'll see a window appear that shows a list of all detected networks. You'll need to wait for a little to populate a list of all the nearby networks.
After it runs for about 60 seconds, exit out of the small window, and a list of targets will appear. You'll notice that networks with someone using them appear in yellow with an asterisk next to them. This is essential since you can't trick someone into giving you the password if no one is on the network in the first place. Select the number of the target you wish to attack, and press Enter
to proceed to the next screen.
Step 5: Gather the Handshake
Now, we'll select the type of de-authentication attack we want to use to kick the user off their trusted network. I recommend the second option, "Deauth Untitled
attack," but different attacks will work better depending on the network.
Press Enter once you've made your selection, and you'll be asked if you'd like to enable DoS pursuit mode, which allows you to follow the AP if it moves to another channel. You can select yes (Y) or no (N) depending on your preference, and then press Enter Finally, you'll select N
for using an interface with internet access. We won't need to for this attack, and it will make our attack more portable to not need an internet source.
Next, it will ask you if you want to spoof your MAC address during the attack. In this case, I chose N for "no."
Now, if we don't already have a handshake for this network, we'll have to capture one now. Be VERY careful not to accidentally select Y for "Do you already have a captured Handshake file?" if you do not actually have a handshake. There is no clear way to go back to the script without restarting if you make this mistake. Since we don't yet have a handshake, type N for no, and press Enter to begin capturing.
Once the capture process has started, a window with red text sending deauth packets and a window with white text listening for handshakes will open. You'll need to wait until you see "WPA Handshake:" and then the BSSID address of your targeted network. In the example below, we're still waiting for a handshake.
Once you see that you've got the handshake, you can exit out of the Capturing Handshake window. When the script asks you if you got the handshake, select Y and save the handshake file. Next, select the location for you to write the stolen password, and you're ready to go to the final step of configuring the phishing page.
Step 6: Set Up the Phishing Page
In the last step before launching the attack, we'll set the language of the phishing page. The page provided by Airgeddon is pretty decent for testing out this style of attack. In this example, we'll select 1 for English. When you've made your selection, press Enter and the attack will begin with six windows opening to perform various functions of the attack simultaneously.
Step 7: Capture Network Credentials
With the attack underway, the victim should be kicked off of their network and see our fake one as the only seemingly familiar option. Be patient, and pay attention to the network status in the top right window. This will tell you when a device joins the network, allowing you to see any password attempts they make when they're routed to the captive portal.
When the victim joins your network, you'll see a flurry of activity like in the picture below. In the top-right corner, you'll be able to see any failed password attempts, which are checked against the handshake we gathered. This will continue until the victim inputs the correct password, and all of their internet requests (seen in the green text box) will fail until they do so.
When the victim caves and finally enters the correct password, the windows will close except for the top-right window. The fake network will vanish, and the victim will be free to connect back to their trusted wireless network.
The credentials should be displayed in the top-right Control screen, and you should copy and paste the password into a file to save, in case the script doesn't save the file correctly. This sometimes happens, so make sure not to forget this step or you might lose the password you just captured.
Control

       Evil Twin AP Info // BSSID: ██████████████ // Channel: 11 // ESSID: ██████████████

       Online time
       00:01:40

       Password captured successfully:

/tmp/ag.control.sh: line 37: ${log_path}: ambiguous redirect
       ██████████████

       The password was saved on file: [/root/evil_twin_captive_portal_password-██████████████.██████.txt

       Press [Enter] on the main script window to continue, this window will be closed
After this, you can close the window, and close down the tool by pressing Ctrl + C If we get a valid credential in this step, then our attack has worked, and we've got the Wi-Fi password by tricking the user into submitting it to our fake AP's phishing page! for full tutorial see: https://null-byte.wonderhowto.com/how-to/hack-wi-fi-stealing-wi-fi-passwords-with-evil-twin-attack-0183880/